

TL;DR:
- Transforming blank walls into curated displays requires a clear workflow, preparation, and style alignment. Gathering the right tools, assessing your space, and visualizing layouts with paper templates help prevent common mistakes and ensure cohesive results. Creative iteration and trusting your instincts allow you to craft a personalized, impactful wall display that feels authentic to your space.
You have a blank wall, a vague idea of what you want, and absolutely no idea where to start. Sound familiar? Transforming empty or mismatched walls into a display that feels intentional and beautiful is something most people underestimate until they are standing on a stepladder with a hammer and three frames that refuse to line up. The good news is that a clear, structured workflow removes the guesswork entirely. Work through the right steps in the right order, and the result is a space that looks curated rather than cobbled together.
Table of Contents
- Prepare for wall decor success: tools, materials and prerequisites
- Step-by-step workflow for planning wall decor
- Troubleshooting common mistakes in wall decor planning
- Verifying your wall decor arrangement: checklists and expected outcomes
- Why creative workflows matter more than strict rules
- Elevate your wall with custom prints and curated art
- Frequently asked questions
Key Takeaways
| Point | Details |
|---|---|
| Preparation is crucial | Gather materials and assess your interior before starting any wall decor project. |
| Follow a clear workflow | Break planning into sequential steps from concept to verification for best results. |
| Avoid common mistakes | Measure, align, and plan carefully to prevent misalignment and style clashes. |
| Checklists drive quality | Use checklists at each stage to ensure your arrangement suits your space and tastes. |
| Creativity leads to impact | Adapt workflows to your unique vision for truly memorable wall decor. |
Prepare for wall decor success: tools, materials and prerequisites
Before you hang a single piece, you need to gather your tools, assess your wall, and align your vision with your space. Skipping this stage is the number one reason people end up with art that feels out of place.
Essential tools and materials
Start by collecting everything you will need before the project begins. This prevents frustrating mid-project trips to the hardware shop and keeps momentum going.
- Tape measure (at least 5 metres)
- Spirit level
- Pencil and painter’s tape
- Hammer, picture hooks, and wall anchors appropriate for your wall type
- Kraft paper or newspaper for template cutting
- Scissors and masking tape for paper layouts
- A camera or smartphone for recording test arrangements
Assessing your space and aligning your style
Walk into the room as if you are seeing it for the first time. Notice the light sources, furniture height, and existing colour palette. A wall art selection guide recommends aligning your artwork style with the room’s existing design language before purchasing anything. This single step prevents the most common mistake: buying a piece you love in isolation that clashes with everything around it.
Think about the mood you want the room to project. A warm, earthy living room benefits from organic textures and muted tones. A modern, minimal space suits bold, graphic prints or black-and-white photography. Refer to wall art styles for interiors to identify which aesthetic categories resonate with your existing decor.
Comparing your material and framing options
Not all frames are equal, and the wrong material can undermine an otherwise beautiful print. Here is a quick comparison of the most common framing options and materials:
| Frame material | Best suited for | Visual effect | Price range |
|---|---|---|---|
| Solid wood | Traditional, rustic, and Scandi interiors | Warm, natural | Moderate to high |
| Metal (aluminium) | Contemporary and industrial spaces | Sleek, minimal | Moderate |
| MDF with veneer | Budget-conscious projects | Versatile | Low to moderate |
| Floating frame | Canvas prints and textured art | Gallery-style depth | Moderate |
| Clip frame (frameless) | Minimalist and student interiors | Clean, airy | Low |
Prints themselves come in a range of formats: fine art prints on cotton rag paper, photographic prints on lustre or gloss stock, canvas prints, and acrylic face mounts. Each format changes how the artwork interacts with light, so factor in room lighting when choosing.
Pro Tip: Measure the wall space twice and write it down before you browse any artwork. Knowing your exact dimensions means you shop with precision rather than guessing whether something will fit.
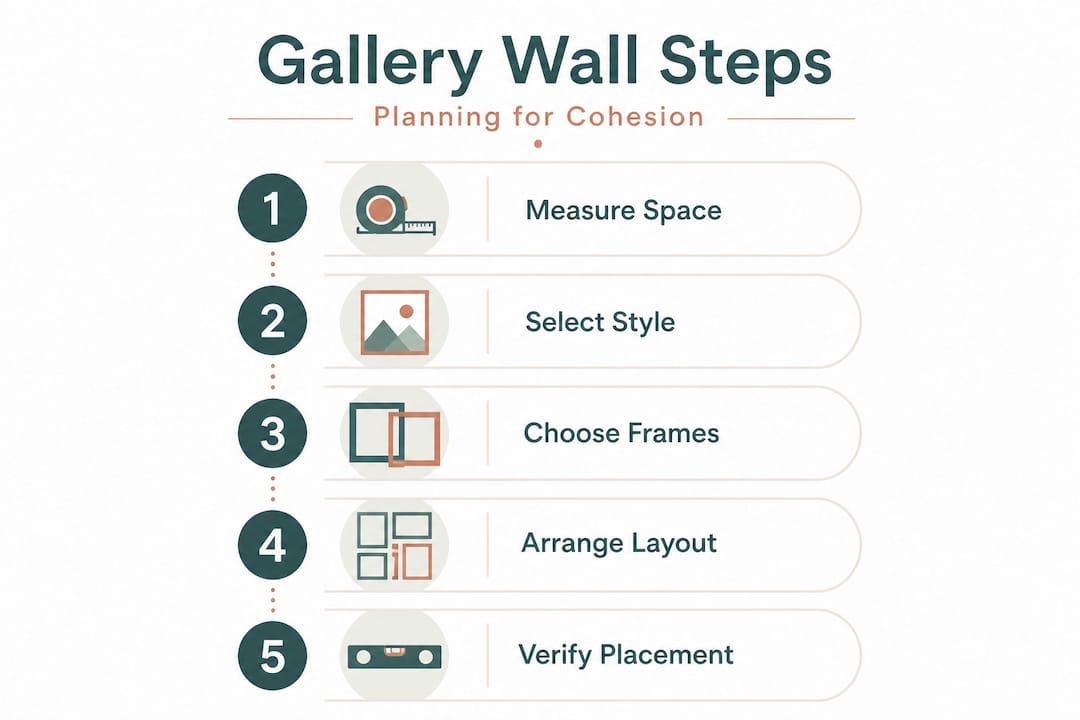
Step-by-step workflow for planning wall decor
With your tools assembled and your style direction clarified, you can move through the actual planning process. Following a clear sequence prevents the chaos of improvising decisions mid-installation.
- Gather inspiration. Save images, visit galleries, or browse online collections. Build a mood board, physical or digital, to spot patterns in what appeals to you.
- Define your focal point. Decide which wall or zone will anchor the display. A focal wall above a sofa or console table is the most common and effective choice.
- Determine your sizing strategy. Will you use a single large statement piece, a symmetrical pair, or a mixed-size gallery arrangement? Each option requires different spacing logic.
- Map the layout on paper. Cut kraft paper templates to the exact dimensions of each piece. Tape them to the wall with painter’s tape to visualise the arrangement before making any holes.
- Refine spacing and alignment. Step back. Adjust templates until the spacing feels balanced. A general rule is to keep gaps between pieces between 5 and 10 centimetres for a cohesive look.
- Mark your hanging points. Once satisfied with the template layout, mark through the paper to identify exact nail positions.
- Hang and check. Hang each piece, checking with a spirit level after every installation.
The gallery wall workflow explained outlines this full process in detail, including how to manage mixed frame sizes and varied art formats without losing visual harmony.
Workflow decisions at a glance
| Step | Core decision | Common mistake to avoid |
|---|---|---|
| Inspiration gathering | Style and mood direction | Collecting too many conflicting styles |
| Sizing strategy | Single piece vs. grouping | Choosing pieces too small for the wall |
| Paper template layout | Exact positioning | Skipping templates and guessing placement |
| Spacing and alignment | Gap consistency | Uneven gaps that create visual noise |
| Hanging | Level and secure fixing | Rushing and skipping the spirit level check |
For a more personalised approach to selecting pieces during step one, the wall art selection process provides a useful framework for matching art to individual taste and room character.
If you are commissioning original or custom pieces, the bespoke wall art guide walks through the additional planning required for ordering artwork made to your precise dimensions and specifications.
Pro Tip: Before committing to any holes in your wall, live with your paper templates for at least 24 hours. What looks right in the afternoon may feel wrong in evening lamplight.
Troubleshooting common mistakes in wall decor planning
Even with a workflow in place, things can go wrong. Knowing the most frequent pitfalls in advance means you can sidestep them rather than fix them after the fact.
The most common planning mistakes
- Hanging art too high. This is the single most widespread decorating error. The general guideline is to centre artwork at eye level, which is approximately 145 to 150 centimetres from the floor. Most people hang pieces 10 to 15 centimetres too high.
- Ignoring scale. A small print on a large wall looks lost and tentative. A piece that is too large for a narrow corridor feels oppressive. Scale is everything.
- Mixing too many styles. Combining three or four conflicting design aesthetics in one gallery wall creates visual noise rather than character. When decorating living room walls, picking one or two complementary styles produces far more cohesive results.
- Neglecting the relationship with furniture. Art should relate to the furniture beneath it. A gallery wall above a sofa should span no more than two thirds of the sofa’s width to feel grounded rather than floating.
- Choosing frames without considering the room’s colour scheme. A gold frame in a room full of silver metallic accents creates instant tension. Colour-matching frames to existing hardware and textiles is a detail that separates amateur from professional results, as explored in custom wall art options.
- Over-crowding the display. Negative space is not wasted space. It gives the eye somewhere to rest and allows each piece to be appreciated individually.
“Scale and balance are the invisible architecture of a great wall display. Get them right and the room feels intentional. Get them wrong and even expensive art looks like an afterthought.” This principle, echoed across professional interior design practice, underpins every successful decor arrangement.
Aligning your choices with a consistent style framework makes all the difference. Reviewing inspiring wall art styles before finalising your selection helps you identify which aesthetic threads tie your display together rather than pulling it apart.
Verifying your wall decor arrangement: checklists and expected outcomes
Once everything is hung, resist the urge to simply declare it finished and move on. A deliberate verification stage ensures the display delivers the impact you planned for.
Final verification checklist
Use this checklist to evaluate your finished arrangement critically before calling the project complete:
- Height: Is the visual centre of the display at eye level (approximately 145 to 150 centimetres from the floor)?
- Level: Are all pieces hanging straight? Check both horizontally and along the gallery line.
- Spacing: Are gaps between pieces consistent, ideally between 5 and 10 centimetres?
- Scale: Does the overall arrangement suit the size of the wall and the furniture it sits above?
- Colour harmony: Do the tones in the artwork complement the room’s palette rather than competing with it?
- Style consistency: Do all pieces belong to the same or complementary aesthetic families?
- Lighting: Does existing room lighting illuminate the display effectively, or does it create unwanted shadows?
- Relatability to furniture: Does the arrangement feel anchored to the furniture below rather than floating independently?
A thorough bespoke wall art approach confirms that even professionally commissioned pieces benefit from this final review stage, because the relationship between art and room only becomes clear once everything is in place.
For pieces in frames, an expert framing art guide provides detailed advice on checking mounts, glazing, and fixings to ensure the presentation quality matches the quality of the art itself. Similarly, the wall art framing process covers practical finishing details that are easy to overlook but make a visible difference to the final result.
Pro Tip: Take a photograph of the finished arrangement and view it on your phone screen. The camera flattens perspective and makes imbalances far easier to spot than looking at the wall directly.
Why creative workflows matter more than strict rules
Here is something the design rulebooks rarely admit: the most memorable wall displays we have ever seen broke at least one of the “rules” outlined in this article.
We see it repeatedly. Someone follows every guideline perfectly. Measurements exact. Frames matched. Spacing immaculate. And yet the result feels sterile, like a showroom rather than a home. Then another person throws caution aside, mixes vintage prints with modern photography, uses mismatched frames, and somehow produces a display that stops every visitor in their tracks.
The difference is creative iteration. The second person tried things, stood back, moved pieces around, lived with it for a week, and adjusted again. The workflow gave them a starting point, not a destination. That is the real lesson.
Rigid rule-following tends to produce safe, predictable outcomes. The workflow we have outlined is a scaffold, not a cage. Use the measurements and checklists to prevent genuinely costly errors, like hanging everything 20 centimetres too high or buying prints that are hopelessly out of scale. But within those guardrails, trust your instincts aggressively.
The best interior designers we know do not ask “does this follow the rules?” They ask “does this feel right in this particular space, with this particular light, for the person who lives here?” Those are fundamentally different questions. Understanding the wall art framing wisdom built up over years of real projects confirms this: technical knowledge enables creative freedom, it does not replace it.
So use this article as your foundation. Then adapt, experiment, and make the space genuinely yours.
Elevate your wall with custom prints and curated art
Now that you have a clear workflow and the confidence to execute it, the next step is finding artwork that genuinely matches your vision. At Frametheworld, we make that process straightforward. Browse our wabi sabi wall art collection for organic, calming prints that work beautifully in contemporary and natural interiors, or explore our curated collections by style, theme, and size to find pieces that fit your precise aesthetic direction. If your project calls for something completely unique, our bespoke custom print service allows you to commission artwork built around your exact dimensions, colour palette, and creative brief. Whether you are decorating a single feature wall or styling an entire property, we have the range and the expertise to help you get it right.
Frequently asked questions
What is the first step in an effective wall decor planning workflow?
The first step is evaluating your wall space and choosing a style or theme that suits your interior, as best practices recommend aligning your artwork to the room’s existing design language before purchasing anything.
How do I select the right frame and print for my wall decor?
Select frames and prints that complement your room’s colour palette and overall design scheme. Detailed framing materials advice explains how different frame materials suit different interior styles.
What are common mistakes people make when planning wall decor?
The most common errors are hanging art too high, ignoring scale relationships, and mixing too many conflicting styles. Following cohesive style guidelines helps you avoid these pitfalls before installation.
How can I check if my wall decor arrangement is successful?
A successful arrangement maintains visual balance, suits the overall room scale, and delivers a cohesive feel. The bespoke wall art process includes a detailed review stage to help you confirm your display meets these criteria.


Leave a comment
This site is protected by hCaptcha and the hCaptcha Privacy Policy and Terms of Service apply.