
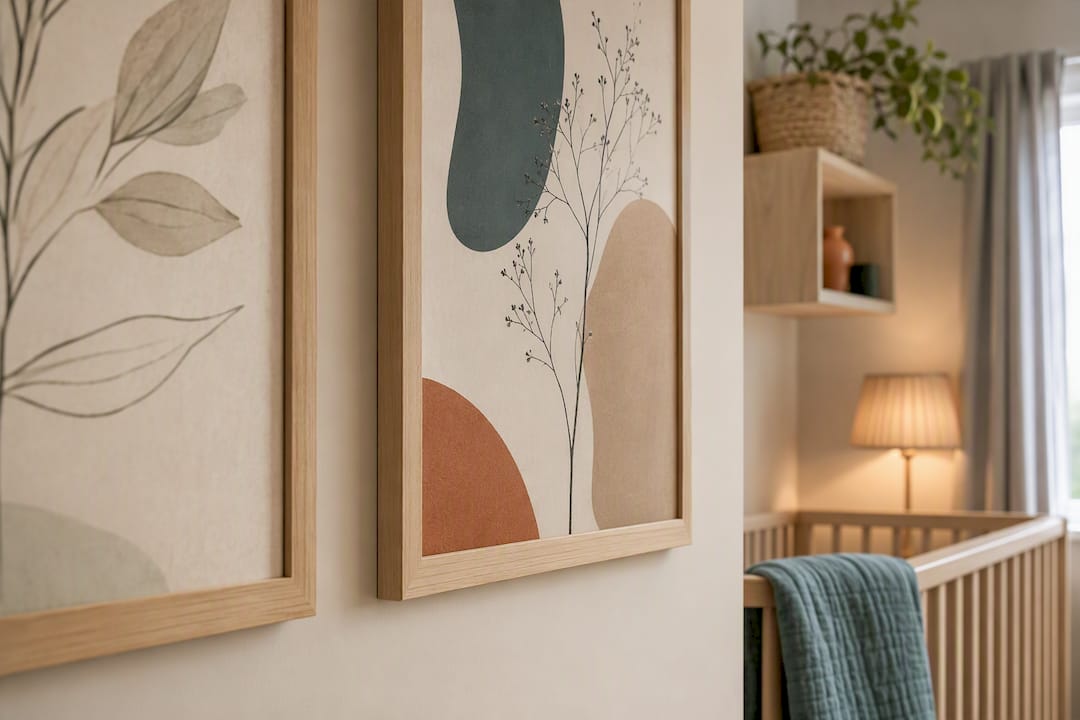
Pick a small number of age-proof pieces, such as botanical prints, soft abstracts, or classic book illustrations, and anchor them above furniture using the two-thirds rule. Never hang anything heavy directly above the cot; choose acrylic glazing and secure fixings instead of glass and adhesive strips. For curated or made-to-measure options, Frametheworld is worth a browse before you buy.
TL;DR:
- Artwork should span about two-thirds of the furniture width, with a cot measuring 120 cm needing roughly 80 to 90 cm of art.
- Use acrylic-framed or canvas pieces near the cot for safety, and secure frames into wall studs with proper hangers to prevent accidents.
- Limit wall art to two or four colors, favoring layered textures and subtle patterns that create a calm, furnished look without feeling flat.
- Hang lightweight, unbreakable pieces out of reach, with the bottom edge 15 to 25 centimeters above furniture, and use paper templates to plan spacing first.
- Incorporate themes like botanical, animal, or abstract art for longevity, and consider DIY projects like pressed botanicals or watercolour swatches for personal touches.
Table of Contents
- 12 nursery wall art ideas worth stealing
- Gallery wall and layout options that actually work
- Colour, wallpaper and accent wall ideas that soothe without boring
- Placement, sizing, and the two-thirds rule
- Materials and installation: the safest formats for a nursery
- Choosing art that grows with your child
- Inspirational themes and motifs for every nursery style
- DIY nursery wall art projects worth trying
- Seasonal and holiday nursery wall art ideas
- Coordinating wall art with your nursery’s overall style
- What we prioritise when curating nursery art
- Find nursery-ready art at Frametheworld
- Sources
12 nursery wall art ideas worth stealing
Some of these will anchor the whole room. Others are the small, cheap additions that make a nursery feel finished rather than staged. Here’s a practical shortlist to work from.
- Botanical prints. Muted greens and warm neutrals age with the child; hang above a dresser or reading nook rather than the cot itself.
- Soft abstract sets. Two or three prints in a shared palette read as one composition and forgive a slightly imperfect hang.
- Classic storybook illustrations. Peter Rabbit, Winnie-the-Pooh, or vintage fairy-tale plates carry cultural longevity and educational value as children grow.
- Black-and-white high-contrast images. Genuinely useful for newborn visual development; swap for colour once the baby is a few months old.
- Framed photo collages. Personal, low-cost, and easy to update as the family grows.
- Removable decals. Wall decals suit trend-led or temporary themes because you can change them without redecorating.
- Textile hangings. Woven or macramé pieces add warmth without the breakage risk framed glass carries, provided they’re mounted out of reach.
- Star or constellation charts. A quietly educational choice that still looks good in a toddler’s room a few years on.
- Personalised name prints. Simple typography ages better than novelty fonts and cartoon characters.
- A large statement canvas. One well-chosen piece behind the cot, or opposite it, often feels calmer than several small frames clustered directly above the sleeping area.
- A small gallery trio. Three matching or complementary pieces above a changing table or armchair.
- A floating shelf vignette. Lightweight prints leaned rather than hung, mixed with a small plant or soft toy, work well away from the cot where the display doesn’t need to be fixed flush to the wall.
Keep anything near the sleeping area lightweight and unbreakable. Save framed glass and heavier canvases for walls the baby isn’t lying directly beneath.
Gallery wall and layout options that actually work
A grid suits a dresser wall where you want order and symmetry. A salon-style cluster of mismatched frames works better beside a rocking chair, where a looser, more collected look feels natural. A trio is the easiest layout to get right for beginners, and a vertical stack fills a narrow wall between a window and a wardrobe without competing for space.
- Keep frame styles or colours consistent across a grouping; mixing finishes randomly reads as clutter rather than curation.
- Leave 2 to 3 cm between frames in a grid, and slightly more in a looser cluster.
- Stick to odd numbers (three, five, seven pieces) for clusters; they feel more balanced to the eye than even groupings.
- Reserve the wall directly above the cot for one piece at most, not a cluster.
Pro Tip: Cut paper templates to the exact size of each frame and tape them to the wall first. You’ll spot spacing problems before you’ve put a single hole in the plaster.
Colour, wallpaper and accent wall ideas that soothe without boring
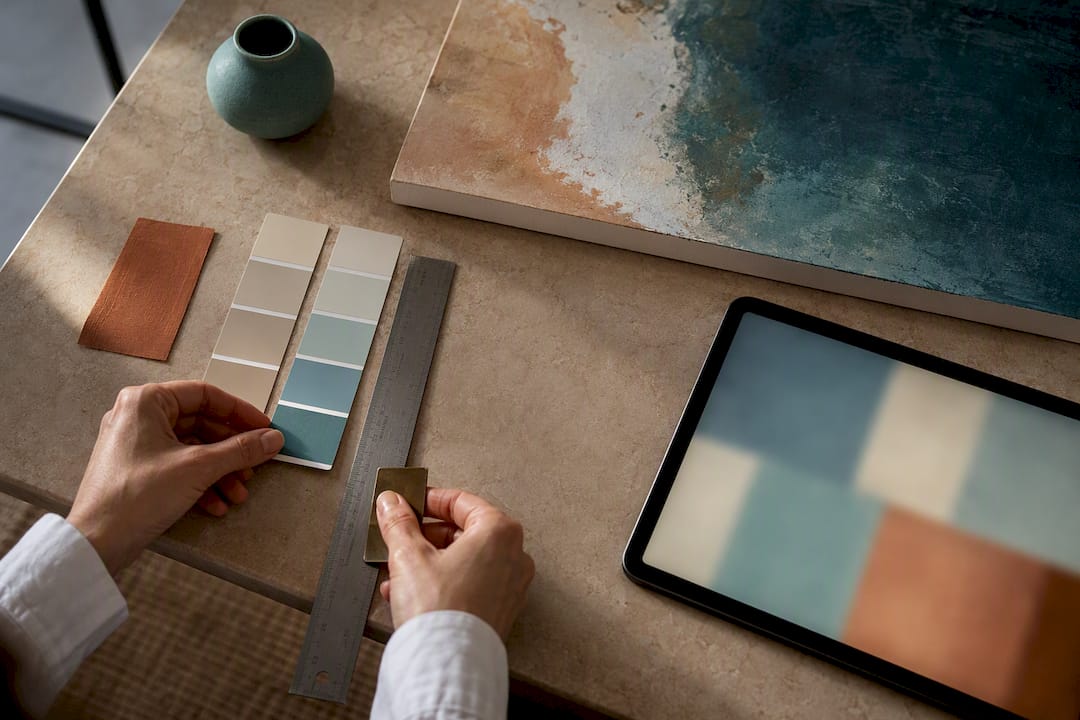
Limit the palette to two or four colours. Muted botanicals, soft geometrics, and watercolour skies all read as calm without tipping into flat and lifeless. Nurseries that mix textures, a woven hanging next to a framed print, a wooden shelf beneath a canvas, tend to feel furnished rather than sparse, and that layered approach ages better than a single flat colour block.
- Wallpaper one wall only, ideally the one behind the cot or the focal wall opposite the door.
- Choose subtle, non-repeating patterns over cartoon character prints, which date the room within a year or two.
- Use high-contrast black-and-white art for the first few months, then introduce colour gradually as your baby’s vision develops.
- If you want an accent wall rather than wallpaper, a painted feature wall behind the cot gives the same visual anchor with far less commitment.
Placement, sizing, and the two-thirds rule
Get the proportions right and even a modest print looks intentional. Get them wrong and an expensive canvas looks like an afterthought.
- Apply the two-thirds rule. Artwork should span roughly two-thirds of the furniture width beneath it: a 120 cm cot calls for around 80 to 90 cm of artwork across.
- Mind the height. Sit the bottom edge a modest distance above the furniture, roughly 15 to 25 centimetres (https://buywallart.ca/blogs/news/nursery-wall-art-placement); centre the piece at roughly eye level when there’s no furniture below it.
- Space multiple frames evenly. Leave a small but consistent gap between pieces in a grouping so the eye reads them as one unit.
- Measure before you drill. Mark the centre point, check it’s level, and locate studs for anything over a kilo or two.
- Secure the bottom corners. Earthquake putty or Velcro dots stop frames swinging or tilting, particularly useful once a toddler starts pulling at things.
For larger statement pieces, Frametheworld’s guide to selecting art size walks through proportion in more detail than a single rule of thumb can.
Materials and installation: the safest formats for a nursery
Format matters as much as image choice here. Acrylic-front framed prints give you the crisp look of glass without the shatter risk, which makes them the safer default anywhere near a cot. Canvas is naturally lightweight and forgiving if bumped. Unframed prints and decals carry no hardware risk at all, though decals can peel over time in humid rooms. Textile hangings add texture and are essentially breakage-proof, but check for OEKO-TEX or GREENGUARD Gold certification and water-based inks to keep emissions low in a room where a baby sleeps for hours a day.
- Fix shelves and heavy frames into wall studs, not just plasterboard.
- Use French cleats or D-ring hangers rated for the frame’s weight rather than a single nail.
- Skip adhesive strips for anything above the cot; they aren’t rated for that kind of risk.
- Choose acrylic glazing over glass for any frame within reach or above a sleeping area.
Pro Tip: Frametheworld’s guide to styling large wall art has practical advice on fixings for canvases that exceed standard picture hook sizes.
Choosing art that grows with your child
The trick is deciding upfront what’s disposable and what’s an investment. Removable decals cost little and suit whatever theme your toddler is currently obsessed with. Framed prints and canvases in botanical, fine-line, or abstract styles cost more but don’t need replacing when the dinosaur phase ends.
- Pick one design language early, botanical, fine-line, or abstract, so pieces added later still feel like they belong.
- Save decals and removable pieces for anything trend-led or character-based.
- Clean textiles gently by hand; most aren’t machine washable once framed or mounted.
- Ask for water-based inks and solid, properly joined frames rather than stapled MDF.
Inspirational themes and motifs for every nursery style
Some themes carry more staying power than others, and it’s worth knowing which before you commit to a whole room’s worth of art.
Botanical and nature motifs, ferns, eucalyptus, pressed florals, sit at the top of most parents’ shortlists because they suit almost any colour scheme and never look like they belong to a specific age. Animal illustrations, done in a fine-line or watercolour style rather than cartoon, split the difference between playful and grown-up.
Maps and travel themes work particularly well in a nursery that will later become a child’s bedroom; a world map or star chart reads as decor at two years old and as a genuine interest at ten. Typography and quotes need care: choose something simple rather than a long sentence in a decorative font, which becomes harder to read from across the room.
Abstract and colour-block art gives you the most flexibility of all, since it doesn’t commit to a subject at all, just a palette. This is often the easiest starting point if you’re decorating before the baby arrives and don’t yet know the personality of the room.
Vintage and storybook illustrations bring warmth and a sense of history, particularly effective in a nursery styled around classic children’s literature rather than a single licensed character. Seasonal and nature-cycle themes, moon phases, tide charts, or weather motifs, offer a quieter, more sophisticated alternative to overtly “babyish” art.
Whichever theme you land on, try to repeat it in at least two pieces so the wall doesn’t feel like a random assortment.
DIY nursery wall art projects worth trying
Not every wall needs a shop-bought print. A few simple projects add character at almost no cost.
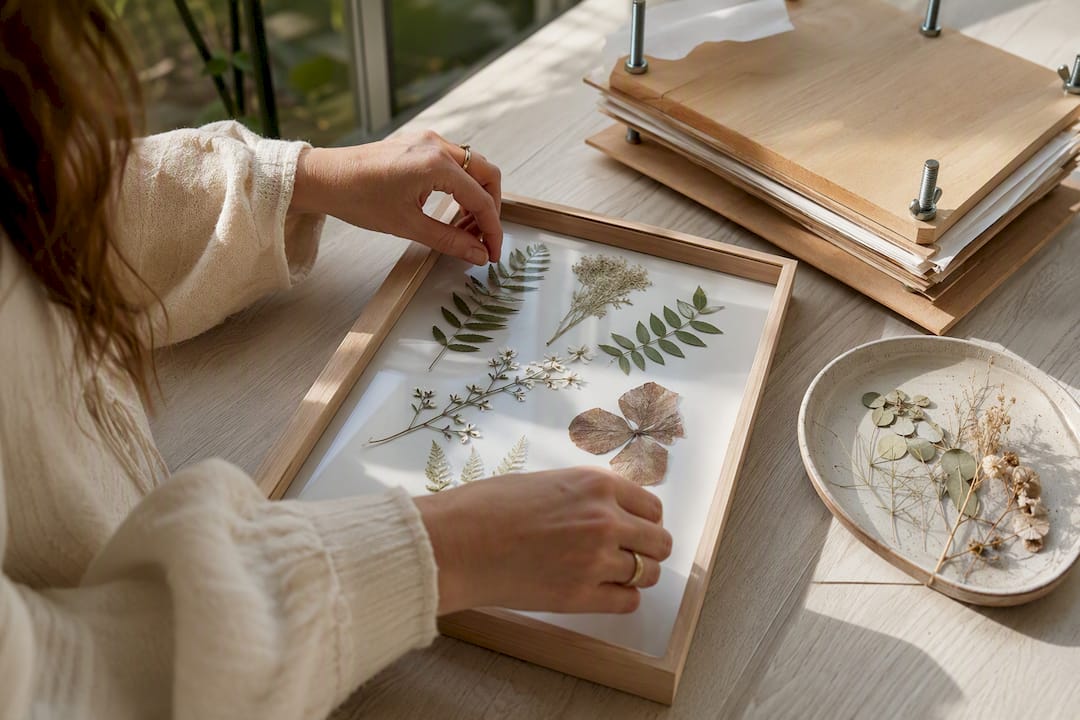
Pressed botanical frames. Press leaves or flowers flat under heavy books for a week, then arrange them behind glass or acrylic in a simple box frame. Three small frames in a row make an effective, inexpensive trio.
Watercolour paint swatches. Cut card into simple shapes, paint loose watercolour washes, let them dry fully, then frame in a matching set. It’s forgiving of imperfect brushwork because the abstract shapes hide any wobble.
Fabric-wrapped canvas. Stretch a favourite fabric, a swaddle print, a piece of your own wedding dress, or an offcut of curtain material, over a plain canvas frame using a staple gun. This works particularly well for parents who want something sentimental rather than purely decorative.
Growth chart print. A simple ruler-style print or painted board doubles as wall art now and a practical measuring tool for years afterwards.
Alphabet or number cards. Print or paint a simple set of letters or numbers in a consistent font and frame them in a grid. This ticks the educational box without looking like a classroom.
Keep any DIY project lightweight and securely fixed, the same safety rules apply whether the art came from a shop or your kitchen table.
Seasonal and holiday nursery wall art ideas
A nursery doesn’t need to be redecorated for every season, but a few small swaps keep it feeling current without disrupting the core scheme. A framed print of falling leaves or a simple pumpkin motif works for autumn without veering into full Halloween decor. Winter suits soft snowflake prints or a muted forest scene far better than anything overtly Christmas-themed, which makes it easier to leave up into January and February.
Spring lends itself naturally to the botanical prints many nurseries already lean on, so this can simply mean swapping in fresh floral tones rather than adding new pieces entirely. Summer works well with lighter, brighter versions of whatever abstract or colour-block art is already on the wall.
The easiest way to handle seasonal changes without constant redecorating is to keep one or two “anchor” pieces permanent, the statement botanical or abstract canvas, and rotate a single smaller print or decal near a shelf or door. That gives you seasonal freshness without unpicking the whole wall each time, and it avoids the cost and waste of buying a full new set of art four times a year.
Coordinating wall art with your nursery’s overall style
Art should echo the room’s existing palette and materials, not fight against them. If the nursery leans Scandinavian, with pale wood, linen curtains, and a muted colour scheme, fine-line drawings and soft abstracts in the same tonal range will sit far more comfortably than anything bold or high-contrast. A boho nursery with rattan furniture and warm textiles calls for textile hangings and botanical prints in earthy tones rather than glossy framed pieces.
Look at the room’s dominant material before choosing frames. A nursery full of light oak furniture suits light wood or thin black frames; a room with brass fixtures and warmer tones pairs better with gold or bronze frame edges. Coordinating artwork with an existing palette is easier once you’ve picked the room’s two or three core colours and simply matched art within that range.
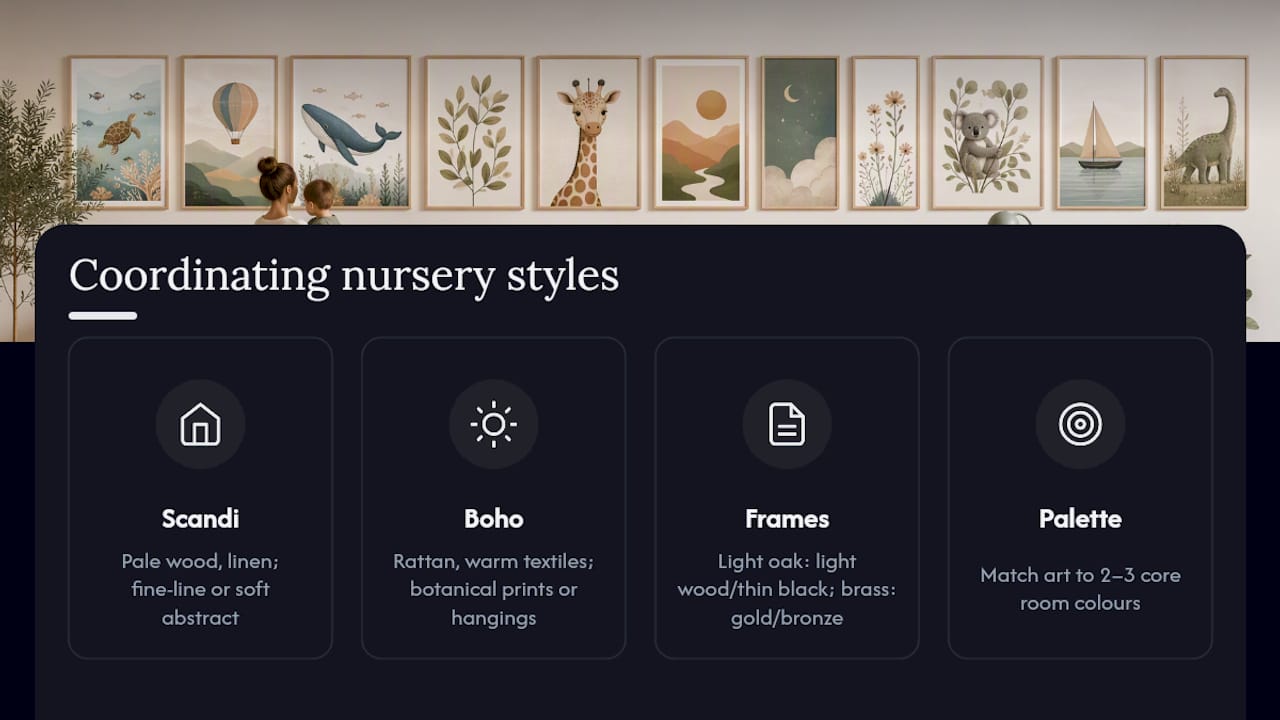
Texture matters as much as colour. A room built around soft textiles, sheepskin throws, woven baskets, quilted blankets, benefits from at least one textile-based wall piece rather than an all-framed wall, which can look flatter and colder than intended. The goal is a wall that looks like it belongs to the room beneath it, not one that was chosen separately and hung on top.
What we prioritise when curating nursery art
Safety, proportion, and longevity come before trend, in that order. A gorgeous print that’s wrongly sized or badly fixed above a cot isn’t a good choice, no matter how well it photographs.
Frametheworld’s curated collections and bespoke commission options exist partly because so many parents want a piece sized exactly for their wall, not the nearest standard size. Ask about acrylic glazing and water-based inks when you enquire; both matter more in a nursery than in any other room in the house.
Start with measurements, choose one to three pieces to anchor the room, then build outward slowly. The smaller additions can wait.
— Lennard
Find nursery-ready art at Frametheworld
Frametheworld gives you a shortcut past the guesswork of sizing, framing, and material choices covered above, with hand-painted collections already curated for scale and finish, plus bespoke commissions when nothing off-the-shelf fits your wall. Browse the Wabi Sabi collection for soft, textured abstracts that suit a calm nursery palette, or the Pop Art collection if you want a bolder statement piece with more colour. Custom sizing means you can match the two-thirds rule exactly rather than settling for whatever standard size happens to fit. If your wall or your idea doesn’t match anything in the current range, get in touch about a bespoke commission and specify acrylic glazing for anywhere near the cot.
Sources
For more on safe display and proportion, see The Baby Cot Shop’s nursery art guide, Happiest Baby’s timeless nursery art ideas, and Frametheworld’s artwork sizing guide.
- How to choose and display wall art in the nursery | The Baby Cot Shop
- 16 Timeless Nursery Art Ideas | Happiest Baby

Leave a comment
This site is protected by hCaptcha and the hCaptcha Privacy Policy and Terms of Service apply.