
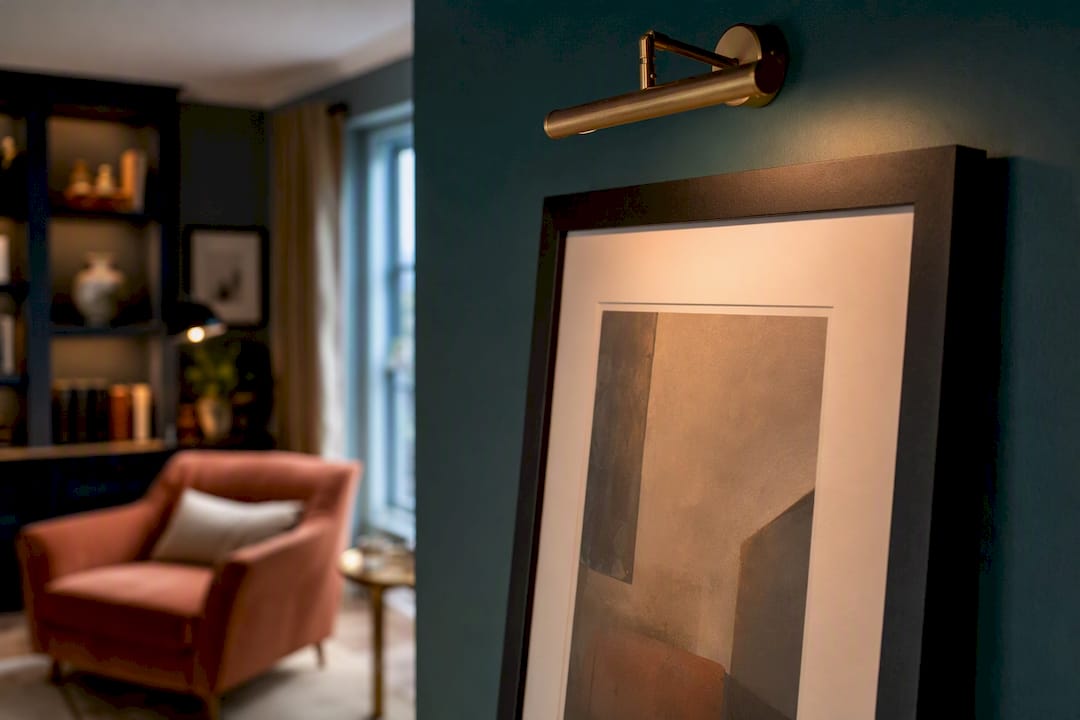
For a single framed piece, a warm white LED picture light beats every other option on the market. For a gallery wall or a growing collection, track spotlights or a wall washer give you more flexibility. Either way, insist on CRI 90+ and 2700–3000K, then follow the 30° rule when you aim it. Everything below explains how to measure, buy, and install that correctly.
TL;DR:
- Use CRI 90+ and 2700–3000K LED fixtures aimed at a 30° angle for optimal color and shadow control on art pieces.
- Choose picture lights for single, static artworks, and track or wall washer systems for flexible collections and large walls.
- Position fixtures approximately 2 to 3 feet from the wall on an 8ft ceiling, adjusting for higher ceilings, and aim for even illumination across the entire piece.
- Prefer LED over halogen for art lighting because of negligible heat and UV emission, which helps preserve sensitive works over time.
- Ensure dimming capability and correct fixture sizing (50 to 66% of artwork width) to maintain appropriate brightness and visual balance.
Table of Contents
- Types of lighting for wall art and when to use each
- What specs actually matter: CRI, Kelvin, beam angle and sizing
- How to place and aim your fixtures correctly
- Battery, plug-in or hardwired: which power option suits your home
- Protecting your art while lighting it well
- Practical styling advice for large pieces and low-light rooms
- How canvas, glass and mixed media change your lighting choices
- Common mistakes that ruin otherwise good lighting
- Design perspective: decorative or invisible, and how to decide
- A bespoke alternative sized to your lighting plan
- Sources
Types of lighting for wall art and when to use each
Three fixture families cover almost every home situation, and the right one depends on how many pieces you own and how often the collection changes.
Picture lights sit directly above a frame and throw a narrow, even wash down the surface. They come in battery, plug-in, or hardwired versions, and they create the most intimate, gallery-cabinet feel of the three because the light source is invisible from most angles in the room.
Track and spotlights mount on the ceiling and can be repositioned or swapped out entirely, which makes them the better choice if you rotate art seasonally or plan to add pieces over time. Track systems and wall washers suit flexible collections because a single run of track can serve five frames today and eight next year without rewiring anything.
Wall washers and recessed downlights spread light evenly across a whole wall rather than pooling on one frame, which is what most galleries use for large canvases or dense gallery-wall arrangements.
- Single statement piece in a living room: picture light, plug-in or hardwired
- Gallery wall with mixed frame sizes: track spotlights, adjustable per piece
- Large canvas or mixed-media wall: wall washer or wide-beam recessed downlight
- Rental property or frequently rearranged art: battery picture lights, no wiring required
If you are planning a multi-piece arrangement, it helps to sort the layout before choosing fixtures, since spacing dictates how many track heads or wall washers you actually need.
What specs actually matter: CRI, Kelvin, beam angle and sizing
Buy on these numbers, not on wattage or brand reputation alone.
- Colour Rendering Index (CRI): look for CRI 90 or above, and push to CRI 95 for anything with strong reds, deep blues, or subtle skin tones. Cheap LEDs flatten colour in ways you will notice within a week.
- Colour temperature: default to 2700–3000K, the warm white range that galleries and conservators favour for paintings. Anything above 3500K starts to feel clinical against oil or acrylic work.
- Beam angle: narrow beams (15° to 25°) suit small or detailed pieces where you want a tight pool of light; wider beams (35° to 40°) suit large canvases or clusters of smaller frames.
- Fixture width: for picture lights specifically, aim for a fixture roughly 50 to 66% of the artwork’s width. A 60cm-wide painting suits a fixture between 30cm and 40cm.
Pro Tip: Many gallery professionals treat swapping low-CRI household bulbs for CRI 95+ LEDs as the single cheapest upgrade you can make to how art looks in a room, often more noticeable than repositioning the fixture itself.
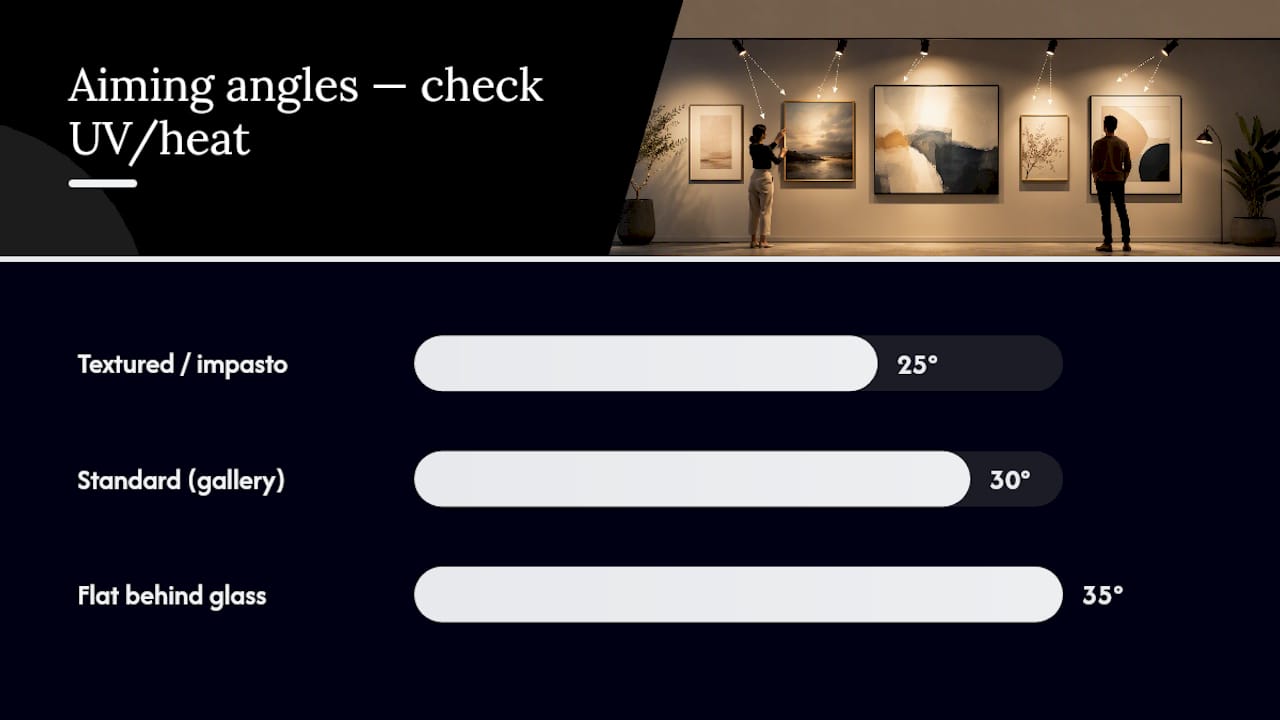
The 30° rule governs the angle: aim the light roughly 30 degrees from vertical. Drop to 25° for heavily textured or impasto work to avoid harsh shadows across the brushstrokes, and increase to 35° for flat pieces behind glass, where a steeper angle helps dodge glare. Whatever spec sheet you’re reading, check specifically for stated UV output and heat figures. If a manufacturer doesn’t mention either, assume it’s a halogen-era product dressed up in new packaging.
How to place and aim your fixtures correctly
Get the geometry right and even a modest fixture will outperform an expensive one hung badly.
On a standard 8ft ceiling, position the fixture roughly 2 to 3 feet out from the wall. For taller ceilings, increase that distance proportionally. A 10ft ceiling wants closer to 3 to 4 feet of standoff, otherwise the beam lands too low on the frame.
Once distance is set, aiming is what separates a flat, even wash from a wall that looks lit by accident.
- Check the beam at the top and bottom edges of the frame. The top should never read more than roughly three times as bright as the bottom, or the eye reads it as unevenly lit.
- For glazed pieces, shift the angle a few degrees until any window or lamp reflection disappears from the glass entirely.
- Where a track covers several frames, space the heads so each piece gets its own beam rather than relying on spill from its neighbour.
- As a rough guide, one adjustable track head per 60 to 90cm of wall covers most standard frame widths without gaps or overlap.
Dimming matters more than most people expect. Art lighting should sit slightly brighter than the room’s ambient light, not so bright that the fixture itself becomes the focal point before the art does. A simple dimmer, or better, a smart preset that drops the level automatically once you leave the room, lets you enjoy a bright evening display without running the lights at full intensity all day, which matters for both your electricity bill and the artwork’s long-term exposure.
Pro Tip: If you’re briefing an electrician rather than doing this yourself, give them the 2 to 3 foot standoff figure and the 30° angle target directly. It saves a second site visit far more often than describing the “look” you’re after.
Battery, plug-in or hardwired: which power option suits your home
Each power option trades installation effort against permanence and running cost.
- Battery or USB-rechargeable picture lights: the easiest retrofit, ideal for rented homes or anywhere you can’t run new cable. Expect to recharge roughly every 6 to 8 weeks with nightly use, so build that into your routine rather than discovering a dark painting one evening.
- Plug-in fixtures: low upfront cost and no electrician needed, but you’re managing a visible cable. Cord covers or routing behind furniture solve most of the visual problem.
- Hardwired or track systems: the most permanent and the cleanest result, but they need a qualified electrician and work best when you’re lighting several pieces at once rather than one frame.
- Smart dimmers and bulbs: confirm compatibility before buying, since not every smart dimmer plays well with every LED driver, and some budget dimmable LEDs lose colour accuracy as they dim. Check the CRI rating still holds at lower brightness, not just at full output.
Protecting your art while lighting it well
LED wins the conservation argument outright. LEDs emit negligible heat and no meaningful UV, which is exactly what causes long-term fading under halogen or old incandescent fixtures. Direct sunlight remains the bigger threat in most homes, so keep sensitive pieces off any wall that gets several hours of direct sun.
- Works on paper: keep exposure to roughly 50 lux or below where possible.
- Oil and acrylic on canvas: considerably more tolerant of higher light levels than paper-based works.
- Add UV-filtering film to nearby windows if a piece sits in a bright room year-round.
- Check LED bulbs periodically for colour consistency and replace with the same CRI and Kelvin spec, not just “a similar looking bulb.”
Practical styling advice for large pieces and low-light rooms
Frametheworld sizes bespoke commissions around standard fixture specifications from the outset, so a picture light or wall washer purchased separately will fit properly without a second trip to the shops.
- For a large-format piece in a dim room, a single wide-beam wall washer usually outperforms two narrow picture lights, since it avoids the “hot spot and dark edge” look that narrow beams create on big canvases.
- Sightlines matter more than most people plan for: stand where you’ll actually view the piece from (a sofa, a hallway entrance) and aim from there, not from directly in front of the frame.
- Coordinate fixture finish with frame hardware; brushed brass fixtures against a black frame read as deliberate, mismatched metals read as an afterthought.
- For guidance on scaling a piece to a specific wall, styling large wall art covers proportion rules that pair directly with the lighting specs above.
How canvas, glass and mixed media change your lighting choices
The surface you’re lighting changes almost every decision above, not just the angle.
Unglazed canvas is the most forgiving surface. Oil and acrylic tolerate a steeper or shallower angle without much visual penalty, and texture in the paint actually benefits from a slightly angled beam that lets brushstrokes catch shadow.
Glazed pieces, meaning anything behind glass or acrylic sheet, are the most demanding. Glare is the enemy, and the standard fix is steepening the angle toward 35° rather than the standard 30°, moving the fixture, or both. Non-reflective or museum glass reduces the problem at the framing stage, which is worth requesting if you’re commissioning a piece that will sit under a window or opposite a bright lamp.
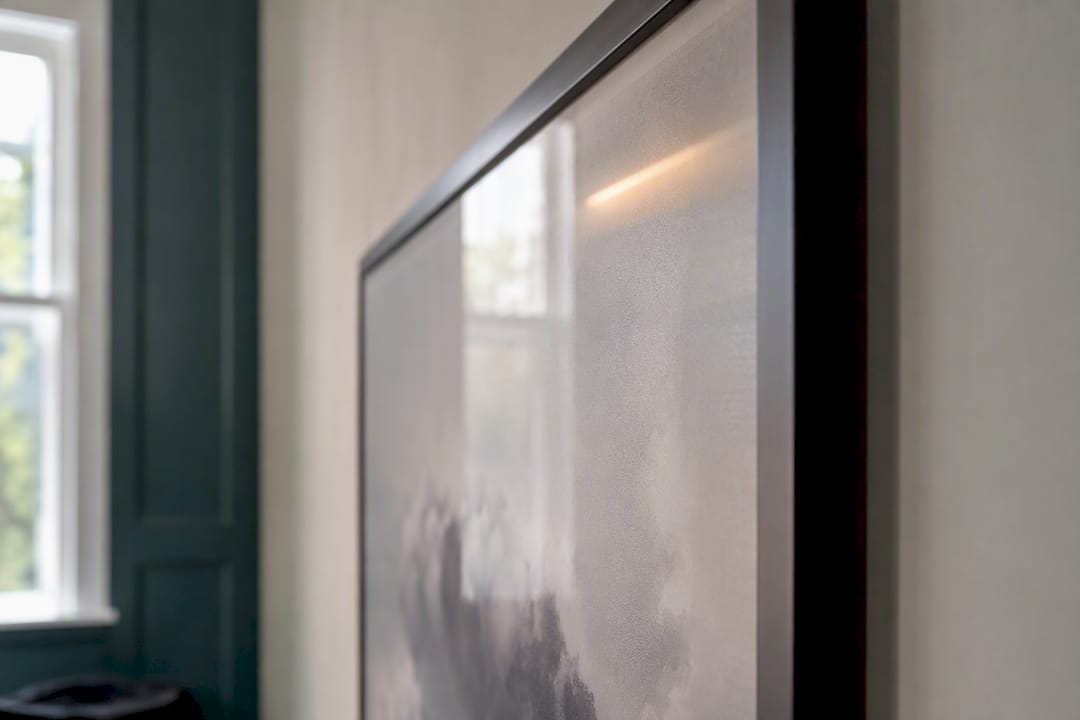
Mixed media, meaning anything combining paint, textured elements, fabric, or dimensional additions, needs the most individual judgement. A single beam angle rarely suits every material on the same piece. Where possible, a slightly wider beam angle evens out the difference between matte and reflective sections rather than a narrow spot that flatters one material and washes out another. If the piece has raised elements, treat it more like impasto than flat canvas and favour the shallower 25° angle to avoid harsh cast shadows across the texture.
Common mistakes that ruin otherwise good lighting
Most lighting failures come down to five repeatable errors, and every one of them is avoidable at the buying or installation stage.
Overlighting the piece. If a visitor notices the fixture before the art, the light is doing the wrong job. Dial it back until it feels incidental rather than staged.
Buying on wattage instead of CRI. A bright bulb with poor colour rendering makes a painting look worse than a dimmer, higher-CRI alternative. Always check the CRI figure before brightness.
Ignoring the angle entirely. Fixtures aimed straight down or straight out create glare on glazed work and harsh top-heavy shadows on canvas. The 30° rule exists precisely because it avoids both failure modes.
Undersizing or oversizing the picture light. A fixture far narrower or wider than the 50 to 66% width guideline either leaves dark edges or looks disproportionate against the frame.
Skipping dimming altogether. Fixed-brightness fixtures force an uncomfortable compromise between “too dim to enjoy” and “too bright to live with,” when a basic dimmer solves it for the cost of one extra component.
Design perspective: decorative or invisible, and how to decide
Invisible, gallery-style lighting suits contemporary spaces and art you want to feel self-sufficient on the wall. Decorative picture lights suit traditional rooms where the fixture itself is part of the frame’s presence, brass against a gilt edge, for instance. Match the fixture’s metal to the frame or nearby hardware, and always add a dimmer. Layering a picture light with ambient room lighting, rather than relying on either alone, gives you the most control over mood without ever touching the art’s condition.
— Lennard
A bespoke alternative sized to your lighting plan
If you’re commissioning rather than buying off the shelf, Frametheworld builds hand-painted pieces to standard sizes that line up with common picture-light and wall-washer widths, so you’re never left retrofitting a fixture around an odd-sized canvas. That sizing conversation happens before the piece is painted, not after it arrives. Browse the Wabi Sabi collection for textured abstract pieces that suit a wide-beam wash, or the Pop Art collection for bold, colour-heavy works where a CRI 95+ fixture will matter most. Get in touch for bespoke sizing advice before you finalise either the artwork or the lighting plan, and the two will fit together properly from day one.
Sources
- How to light your artworks | Christie’s
- Best LED lighting for art galleries in the UK | Detail Lighting
- How to light art at home: complete guide | Austin Gallery
- 8 Tips for Lighting Art: How to Light Artwork in Your Home | Architectural Digest


Laat een reactie achter
Deze site wordt beschermd door hCaptcha en het privacybeleid en de servicevoorwaarden van hCaptcha zijn van toepassing.