
TL;DR:
- There are various effective ways to display cityscape prints, from gallery clusters to floating shelves. Choosing the right style depends on the room and the mood, with photographic, illustrated, abstract, and silhouette options fitting different spaces. Proper measurement, lighting, framing, and placement ensure a cohesive and considered cityscape display.
Here are ten ready-to-use cityscape print display ideas you can start planning today.
- Gallery wall cluster (living room): Arrange five to nine framed cityscape prints in a loose organic cluster. Mix portrait and landscape orientations, keep moderate spacing between frames, and use a single palette to unify them. Gallery walls work best when you vary frame sizes but hold a consistent mat colour.
- Single large focal print (living room, reception): Hang one oversized print centred above a sofa or console. Measure the wall width, then choose a print that spans roughly two-thirds of it.
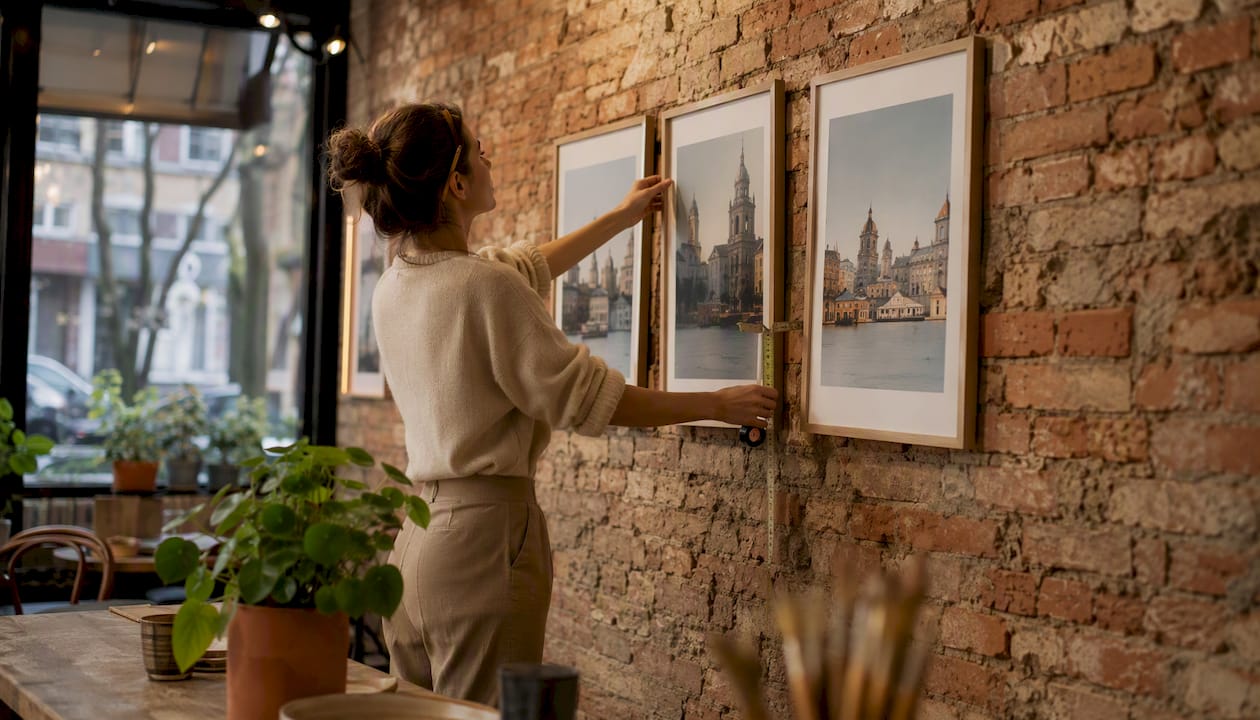
- Triptych / three-panel (dining room, hallway): Split one cityscape image across three equal canvases. Space each panel a few centimetres apart and hang them at the same height so the skyline reads as one continuous scene.
- Framed grid (home office, study): Arrange four or six identically sized prints in a symmetrical grid. Use a level and identical frames for a clean, architectural look.
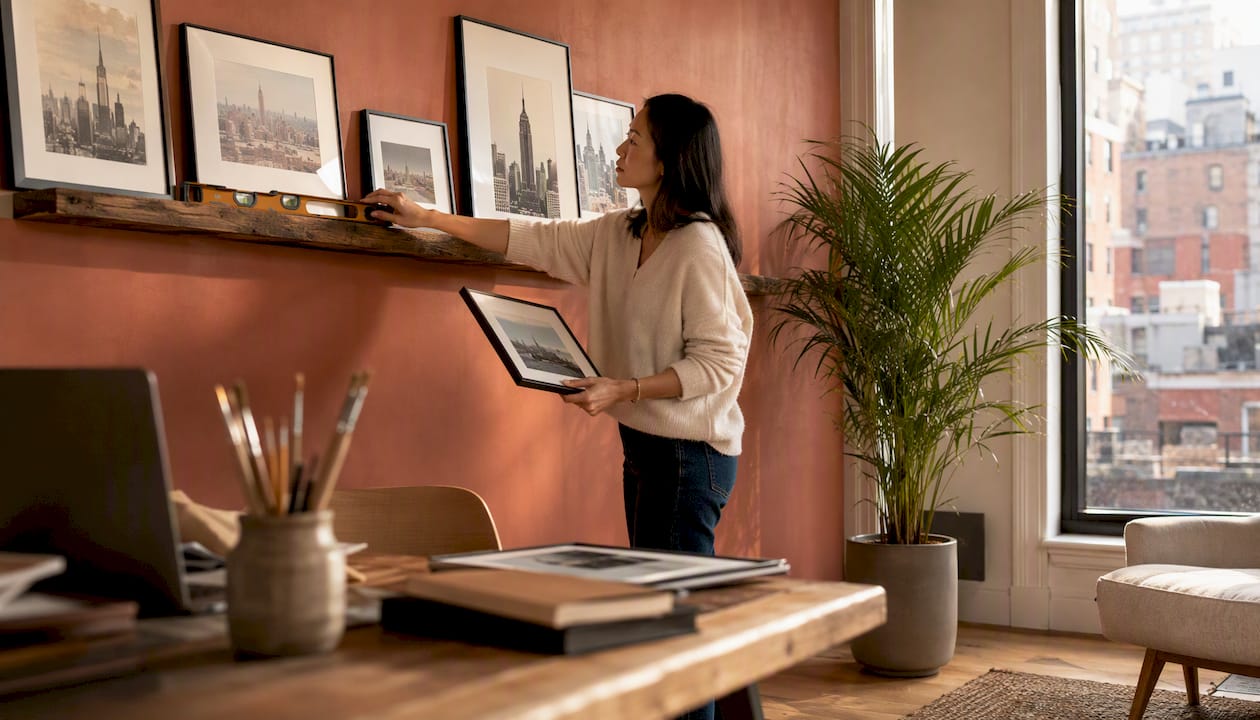
- Shelf layering (bedroom, living room): Lean a few framed prints against the wall on a picture ledge or shelf, overlapping slightly. Rotate prints seasonally without touching a drill.
- Linear row above a sofa (living room): Hang several prints in a straight horizontal line, centred at an appropriate mid-point height to the mid-point of each frame. Keep the row width within the sofa’s footprint for balance.
- Lean-and-layer on a console (hallway, entryway): Rest a large framed cityscape against the wall on a console table, then layer a smaller framed print in front. Add a plant or lamp to anchor the vignette.
- Rotating clipboard or poster rail system (home office, studio): Fix a row of wooden clipboards or brass poster rails to the wall and swap prints freely. No new holes, no commitment.
- Mini-grid for small prints (bathroom, narrow hallway): Cluster six to nine small prints (15 × 20 cm or 20 × 25 cm) in a tight grid with 3 cm gaps. The density makes small pieces feel intentional rather than lost.
- Shelf-to-ceiling vertical stack (narrow walls, staircase): Stack several prints vertically on a tall, narrow wall, each centred on the same axis. Works well with a staircase where horizontal space is limited.
Table of Contents
- Which cityscape print style suits which room?
- How to set up eight favourite cityscape display layouts
- How do frames, glazing and lighting affect cityscape prints?
- How do you hang cityscape prints correctly?
- Where can you buy or commission cityscape prints in the UK?
- Key takeaways
- The detail most people overlook when displaying cityscapes
- Frametheworld: bespoke cityscape art for UK homes and offices
- Useful sources
Which cityscape print style suits which room?
Choosing the right style of cityscape print before you think about layout saves a lot of repositioning later. There are four broad categories, and each has a natural home.
Photographic and architectural prints are the most literal: sharp detail, real perspective, often monochrome or lightly toned. They suit living rooms and home offices where you want the image to hold attention up close. Pair them with thin black or brushed-metal frames and a white or off-white mat. Muted or monochrome cityscapes preserve a calm atmosphere in spaces where you need to concentrate or unwind, which makes them a natural fit for bedrooms too, provided the image is not too busy.
Illustrated and sketch-style prints have a looser, hand-drawn quality. They work well in creative studios, children’s rooms, and informal dining spaces where a photographic level of realism would feel too corporate. Natural wood frames and cream mounts complement the warmth of ink-on-paper illustration.
Abstract cityscapes interpret the urban environment through colour fields, gestural marks, or fragmented geometry. These suit contemporary living rooms and open-plan spaces where you want the print to function as a colour anchor rather than a literal scene. Because perspective and horizon placement are deliberately distorted in abstract work, the composition tends to read well from a distance, making large-format pieces particularly effective.
Minimalist skyline silhouettes strip a city down to its outline. Laser-cut metal versions are lightweight and wall-mountable, while printed silhouettes on white or pale stock suit Scandi-influenced and industrial schemes. Thin frames or no frame at all keeps the graphic quality intact.
- Photographic: thin black or metal frame, white mat, living room or home office
- Illustrated: natural wood frame, cream mount, studio or dining room
- Abstract: deep float frame or frameless canvas, open-plan living spaces
- Silhouette: minimal or no frame, Scandi, industrial, or modern hallway
Pro Tip: Before committing to a frame colour, hold a paint swatch of your wall colour next to the print. A warm-toned wall (terracotta, sand) reads very differently against a cool silver frame than against a warm oak one.
How to set up eight favourite cityscape display layouts
The table below summarises the eight most practical layouts. Detailed notes follow.
| Layout | Best for | Ideal print size | Typical spacing | Quick setup note |
|---|---|---|---|---|
| Gallery wall cluster | Living room, landing | Mix of 15×20 cm to 50×70 cm | 5–8 cm between frames | Map on floor before hanging |
| Single large focal | Living room, reception | 50 cm wide or larger | Centred on wall | Hang at 145–150 cm to centre |
| Triptych / three-panel | Dining room, hallway | Three equal panels | 3–5 cm between panels | Use a spirit level across all three |
| Framed grid | Home office, study | Identical sizes, 30×40 cm or 50×70 cm | Equal gaps, 4–6 cm | Laser level saves time |
| Shelf layering | Bedroom, living room | 15×20 cm or 20×25 cm | Overlapping on ledge | No drilling required |
| Linear sofa row | Living room | 15×20 cm or 20×25 cm each | 5–10 cm between frames | Row width = sofa width |
| Clipboard / poster rail | Home office, studio | A4 to A2 | Rail width | Swap prints without new holes |
| Vertical stack | Staircase, narrow wall | 15×20 cm or 20×25 cm | 8–10 cm between frames | Centre each print on same vertical axis |
Gallery wall cluster
Lay all frames on the floor first and photograph the arrangement from above. Transfer the layout to the wall using kraft-paper templates cut to each frame size, fixed with painter’s tape. This lets you adjust positions without a single nail hole. Aim for a roughly rectangular overall footprint, even if individual frames are staggered, so the cluster reads as a deliberate composition rather than a random scatter.

Single large focal print
The print should span roughly two-thirds of the wall width. Hang the centre of the frame at 145–150 cm from the floor, which places the visual midpoint at average UK eye height. If the print sits above a sofa, leave 15–20 cm of clearance between the top of the sofa back and the bottom of the frame.
Triptych
Mark a centre point on the wall, then work outward. The total width of all three panels plus their gaps should not exceed two-thirds of the wall width. A spirit level across the top edges of all three frames is non-negotiable here; even a 2 mm drop is visible when a continuous skyline runs across the panels.
Framed grid
Identical frames are the key. Buy them in one order so the moulding profile and colour match exactly. Use a laser level to set horizontal and vertical guide lines, then measure equal gaps (4–6 cm works for most grid sizes) from those lines outward.
Pro Tip: Cut cardboard templates to the exact frame size and tape them to the wall before drilling. Spend ten minutes on the mock-up and you will save yourself from filling unnecessary holes.
Shelf layering and rotating systems
Picture ledges from most UK home retailers hold frames up to about 50 × 70 cm safely. For a rotating clipboard system, fix the clips or rails into wall studs or use appropriate plasterboard anchors rated for the combined weight of the clips and prints.
How do frames, glazing and lighting affect cityscape prints?
Glazing options compared
| Glazing type | Pros | Cons | Best for |
|---|---|---|---|
| Standard glass | Low cost, widely available | Heavy, reflects light, shatters | Small prints, low-traffic areas |
| Acrylic / plexiglass | Lightweight, shatter-resistant | Scratches easily, can bow in large sizes | Large prints, children’s rooms |
| Museum / anti-reflective glass | Near-invisible, UV-filtering | Expensive, heavy | Photographic prints, statement pieces |
Framing protects paper-based prints from UV damage and temperature fluctuation. For cityscape photography with fine tonal detail, museum glass is worth the cost because it removes the mirror-like reflection that standard glass creates under overhead lighting.
Frame finishes and matting
Thin black or brushed-metal frames suit minimalist skyline silhouettes and monochrome photography styles. Natural oak or walnut frames work with illustrated and warm-toned prints. Deep float frames (where the canvas sits inside a recessed box) give abstract cityscapes a gallery feel without a mat. For photographic work, a white or off-white mat of at least 5 cm on all sides adds breathing room and makes the image feel considered rather than cramped. The expert framing guide from Frametheworld covers float frames, deep mounts, and anti-reflective glazing in practical detail.
Lighting
Directional accent lighting reveals surface texture and prevents the flat, washed-out look that overhead ambient light creates on glazed prints. Position a picture light or adjustable spotlight so the beam hits the print at roughly a 30-degree angle from above, not straight on. This avoids the hotspot reflection that ruins photographic detail.
Colour temperature matters. Warm white (2700–3000 K) flatters illustrated and abstract cityscapes; cool white (3500–4000 K) suits monochrome photography by preserving its tonal contrast.
Pro Tip: Ambient lighting should be adjusted to minimise glare on glass frames to enhance viewing. If you cannot reposition a ceiling light, switch to acrylic glazing or museum glass, both of which reduce reflection significantly.
- Avoid hanging glazed prints directly opposite large windows; reflected daylight creates glare that shifts throughout the day.
- For plasterboard walls, use hollow-wall anchors rated to at least twice the frame weight.
- For masonry, use a rawlplug and screw rated for the load.
How do you hang cityscape prints correctly?
The short answers: hang the centre of each frame at 145–150 cm from the floor, leave 5–10 cm between framed prints as a baseline gap, and use the 2:3 rule when grouping prints across a wall.
The 2:3 rule means the total width of your print grouping should cover roughly two-thirds of the wall it sits on. For a 3-metre wall, that is 2 metres of art. For a 2.4-metre wall above a sofa, aim for 1.6 metres. This proportion prevents the display from looking either cramped or lost.
Step-by-step hanging checklist:
- Measure the wall width and calculate two-thirds for your target grouping width.
- Mark the centre point of the wall at 145–150 cm height with a pencil dot.
- Cut kraft-paper or cardboard templates to each frame size and tape them to the wall with painter’s tape.
- Step back and assess the arrangement. Adjust templates until the balance feels right.
- Mark hanging-point positions through the templates with a pencil.
- Remove templates. Use a spirit level to confirm all marks are level.
- For plasterboard: use a stud finder to locate joists where possible; otherwise use hollow-wall anchors rated for the frame weight.
- For masonry: drill, insert a rawlplug, and drive a screw at the correct angle for the hook type.
- Hang frames and check level again before removing pencil marks.
- Stand back at the room’s natural viewing distance (typically 2–3 metres) and make final adjustments.
Hardware checklist:
- Spirit level (or laser level for grids)
- Tape measure
- Pencil
- Painter’s tape and kraft paper for templates
- Stud finder
- Picture hooks rated to the frame weight
- Hollow-wall anchors (for plasterboard where no stud is present)
- Rawlplugs and screws (for masonry)
- Rubber bumpers for the bottom corners of frames (prevents tilting)
For home office arrangements, consider how door swing and natural light from windows affect where prints can realistically hang without glare or obstruction.
Where can you buy or commission cityscape prints in the UK?
The right sourcing option depends on how specific your requirements are.
Ready-made prints are the fastest route. High-street retailers and online marketplaces carry standard cityscape photography and illustrated prints in common frame sizes. The trade-off is limited size choice and no control over colour grading or finish.
Prints on demand let you specify size and paper stock, and some services offer basic colour adjustments. They suit buyers who need a non-standard dimension or a limited run of matching prints for a commercial space.
Bespoke commissions are the right choice when you need a specific city, a particular palette, or a hand-painted piece that will not appear in anyone else’s home. The process typically runs: written brief (city, size, colour references, mood) → digital proof or sketch → production → delivery. Timescales vary, but allow four to eight weeks for a hand-painted commission.
Frametheworld’s cityscape collection includes hand-painted and printed urban artworks available in custom sizes. Their urban interiors blog demonstrates practical experience with cityscape and modern wall-art installations, which is useful context when briefing a commission.
For metal skyline silhouettes, laser-cut pieces are widely available from specialist wall-art retailers and make a lightweight alternative to glazed prints in minimal or industrial schemes.
Commissioning checklist:
- Decide on city, orientation (portrait or landscape), and dominant palette before contacting a supplier.
- Provide reference images: photographs of the room, paint swatches, and any existing art you want the new piece to complement.
- Confirm the exact finished size, including whether that measurement includes or excludes the frame.
- Ask for a digital proof before production begins.
- Clarify delivery packaging: large glazed frames need specialist wrapping.
Pro Tip: For custom sizes and finishes, specify the wall measurement first, then work backwards to the print size. A print that is 5 cm too wide for the space will always look wrong, regardless of how good the image is.
Key takeaways
The most effective cityscape displays combine a layout matched to the room’s scale, a mock-up before any drilling, and glazing and fixings chosen for the specific wall type and print size.
| Point | Details |
|---|---|
| Match layout to room scale | Use the 2:3 rule: your grouping should span roughly two-thirds of the wall width. |
| Mock up before drilling | Tape kraft-paper templates to the wall and step back before marking any holes. |
| Choose glazing deliberately | Museum glass suits photographic prints; acrylic suits large or high-traffic locations. |
| Rotate displays over time | Clipboard and poster-rail systems let you refresh prints without new fixings. |
| Frametheworld for bespoke pieces | Frametheworld’s cityscape collection offers hand-painted and custom-sized urban artworks for UK buyers. |
The detail most people overlook when displaying cityscapes
Most display advice focuses on spacing and symmetry, which matters. But the decision that actually determines whether a cityscape display feels considered or accidental is the relationship between the print’s internal horizon line and the viewer’s eye level in the room.
A cityscape with a low horizon (lots of sky, tall buildings rising into the upper half of the image) reads very differently when hung at 145 cm to centre versus 165 cm. At the lower hang height, the buildings feel monumental; the viewer looks up into the scene. At the higher position, the image flattens and the sky dominates in a way the composition was not designed for. This is why the standard eye-height guidance exists, but it is also why you should look at the print’s internal geometry before defaulting to it.
The same logic applies to triptychs. A continuous skyline split across three panels only works if the horizon line is perfectly level across all three. A 2 mm drop on the right-hand panel breaks the illusion completely. The mock-up step is not optional here.
Lighting is the other underestimated variable. A photographic cityscape with fine tonal detail in the shadows will look muddy under warm ambient light and sharp under a directional cool-white spot. The print has not changed; the light has. Spending £20 on a clip-on picture light often does more for a display than spending £200 on a better frame.
Frametheworld: bespoke cityscape art for UK homes and offices
If you have worked through the layouts and know roughly what you want on the wall, the next question is where the print itself comes from. Ready-made options are fast but generic. Frametheworld offers something more specific: hand-painted cityscapes and decorative canvases that can be sized, coloured, and styled to the exact space you are working with.
The process is straightforward. You share a brief (city, dimensions, palette, mood references), Frametheworld produces a proof, and production follows once you are satisfied. The result is a piece built for your wall, not a standard size that happens to fit. Their cityscape collection is a good starting point for seeing the range of styles available, from photographic urban prints to hand-painted abstract interpretations. For rooms where you want something that sits alongside texture-driven or abstract pieces, the Wabi Sabi collection offers complementary hand-painted works in muted, considered palettes.
Visit the Frametheworld cityscape collection or contact the team directly to request a commission quote.
Useful sources
- Gallery walls and print display ideas — practical guidance on mixing sizes and orientations
- 5 Tips for Installing Street Art in Your Home — Artsy editorial on framing, glazing and lighting for urban prints
- Expert Guide to Framing Art for Stunning Interiors — Frametheworld’s framing and glazing reference
- 7 Innovative Wall Art Ideas for Urban Interiors — Frametheworld’s trend guide for urban and cityscape installations
- Cityscape wall art collection — Frametheworld’s curated cityscape prints and custom options
- Decorative prints: inspiring examples and trends — Frametheworld’s 2026 trend and inspiration guide


Laat een reactie achter
Deze site wordt beschermd door hCaptcha en het privacybeleid en de servicevoorwaarden van hCaptcha zijn van toepassing.